Are you constantly struggling with your Wi-Fi speed? Fed up with Netflix buffering just when you get to the best part? If you answered yes, then this article is for you. We’ll show you how to increase your Wi-Fi speed so media buffering will become a thing of the past.
How to Boost Your Wi-Fi Speed
1. Run a Speed Test.
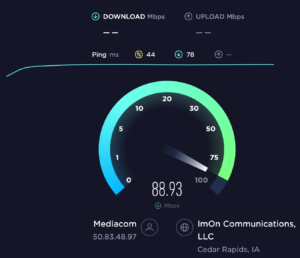
Before we go into how to increase your WiFi speed, you’ll want to run a test to check your current Wi-Fi speed. It’s easy to do this, just Google “speed test” and hit “run a speed test.” or use Speedtest by Ookla. You want to do this so you’ll know your current network speed before you start applying the tips to boost it– so you can easily compare your internet speed before and after this article.
2. Check Your Current Internet Plan.
Before you start searching for ways to increase your Wi-Fi speed, it’s best to check out your internet plan. This is important for two reasons. First, so you’ll know what kind of internet speed you should expect to attain. And secondly, so you won’t waste your time in the case that your slow network speed is due to the lower speed plan you are paying for.
3. Use 5GHz Frequency
Using the 5 GHz network has numerous advantages, with the only disadvantage being that it has a shorter reach than the more commonly used 2.4 GHz network. But it more than makes up for this with its network capacity. 5 GHz network can carry way more data than the standard 2.4 GHz, giving you faster Wi-Fi speeds.
Another relatively unknown advantage of 5 GHz is the fact that not many people use it, so there’s less competition from network connections. And less network competition means faster internet speeds for you.
4. Move to a Better Channel.
If you didn’t know, Wi-Fi has channels. A Wi-Fi channel is the frequency at which your router sends out information to your device. And the more congested a channel is, the slower it works. So moving your Wi-Fi router channel to an unused one or one with the lowest usage in your area may significantly increase your Wi-Fi speed.
Here’s how to move to a different Wi-Fi channel:
First, download a Wi-Fi Analyzer. This tool can show you all the Wi-Fi signals your computer can detect, and it’ll also show you what frequency and channel they’re on. Open this tool, then take note of the network channel(s) with the least usage. Make sure to check for both 5GHz and 2.4GHz networks.
All you have to do from there is:
- Open a browser.
- Type your router’s IP address in the search bar and hit Enter. This can be found on a sticker placed on your router. If you can’t find it, then follow the instructions here.
- Next, log in to your router. If you don’t know your router’s username and password, then check the router for a sticker containing said information or contact your service provider.
- Once you’ve logged in, navigate your way to Wireless Settings (note: the name may vary depending on your service provider).
- Now, you should be seeing the bands available to you (2.4 GHz and/or 5 GHz). If there’s an Auto-Connect setting, switch it off.
- Then, click channels and change your Wi-Fi channel to the least crowded one.
- Click save or apply.
5. Use an Ethernet Connection
Even though Wi-Fi connectivity has greatly improved in recent years, using an ethernet cable for internet connection will still provide you with faster internet speeds. Using ethernet instead of Wi-Fi is more stable, reliable, and faster. Although it’s not as convenient as Wi-Fi, it’s definitely worth it if you want absolutely blazing internet speeds.
6. Change Your Domain Name Server (DNS)
DNS, or Domain Name System, is a system that translates domain names to IP addresses, allowing users to access websites using easy-to-remember names instead of numbers. It’s a distributed database maintained by servers across the internet. By default, you’ll be connected to your service provider’s DNS. And that isn’t always the fastest option.
You can download a tool like DNS Benchmark to test your DNS performance. It also shows you other high-performing DNS server options you can connect to. Most devices that can connect to a WiFi network can have their DNS changed, but it’s best to only change the DNS of your router because the speed gains will affect the devices you connect to it.
Different routers have different ways to change DNS settings. So here’s what to do:
Search the web by entering the make and model of your router and adding “change DNS”. If you’re lucky, you’ll find a clear set of instructions. Navigate to the desired setting and enter the primary and alternate DNS addresses for the service you chose. You may need to restart the router for the change to take effect.
7. Restricting App’s Background Data Usage Can Increase Your Phone’s Wi-Fi Speed
Many apps use your internet connection in the background. So, while you’re doing something else, an app like WhatsApp will be constantly using your data connection to stay connected to receive and deliver new messages. Things like this obviously strain your connection, making it slower. So limiting or stopping apps from using your connection in the background will increase your internet for the apps you are using.
With these tried and true tricks for increasing Wi-Fi speed, you should be smoothly surfing the web in no time. If you’ve tried these methods and are still having speed issues, it’s probably time to give your provider a call and get advice directly from the source.


